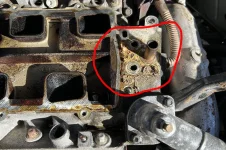
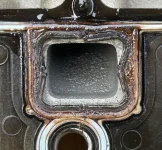
On my 2000 Lesabre theres a dealer service decal. It looks like GM dealers added an coolant sealant to help the known lower
intake issue. You can see the sealant or crud in the photos.
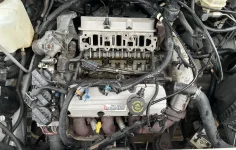
I added a few pics. One shows the new EGR stovepipe that leaves a bigger gap to avoid melting the plastic plenum. I have two plenums from Rockauto. One came with the inner tube and one did not. I have two Lesabres and this is the first one that I'm doing the gasket fix to.
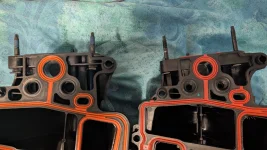
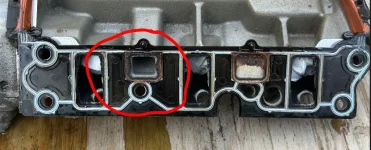
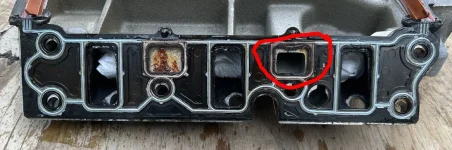
Also added a couple of pics with two of the ports of the original gasket showing signs of failing.
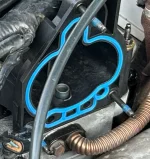
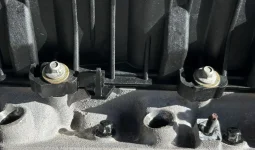
Another pic showing that I added a washer to the fasteners of the plenum to the lower
intake. I think that helps to avoid point loading the plastic and breaking it. Just follow the instructions on the torque sequence and do not over torque them.
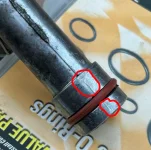
I put the new aluminum coolant elbows in. I noticed theres extra flash from on the aluminum that need to be filed flush other wise you can feel that tube rub against the mating hole. Once filled off I used grease on the o-rings to make them slid in easy and fit. You dont want to roll or pinch the o-rings.
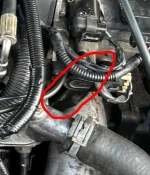
Theres a bracket that attaches to the throttle body to the LIM. I removed the nut and unscrewed the stud in the throttle body to make it easier to remove the plenum when all the fasteners are loose. I didnt install the throttle body to the new plenum and it was a pain to deal with. So I would suggest to first install the throttle body to the plenum and then install that assembly to the LIM.
Since I also replaced both valve cover gaskets I removed the altenator and also the coolant braket with the elbows. Its just a few more bolts to remove that are easy to access. With the altenator removed it makes accessing the rear valve cover easier. Also with the coolant bracket removed you dont have to screw around aligning the elbow into the LIM during reinstallation. To remove the rear valve cover theres a bracket on the back of the engine to loosen which also helps, 2 nuts to loosen, dont remove.
There are a ton of YT videos which show this repair.
Overall its not too difficult of a job.