abizzle
Well-known member
- Joined
- Jun 19, 2021
- Messages
- 1,051
- Reaction score
- 459
- Points
- 83
- Location
- Denham Springs, LA
- Buick Ownership
- 2018 Regal Sportback Essence
Been a while since I last posted. My 2018 Sportback now has 121K miles and it left me stranded for the 4th time. This car has been a maintenance nightmare and has created a constant sucking sound emanating from my wallet!
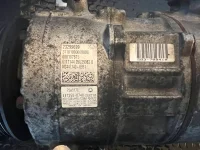
My A/C compressor seized yesterday shortly after I left work and I ended up having to leave it overnight at a semi-shady gas station 15 miles from home. It started as a rough idle and quickly escalated to smoke coming from the right front wheel area. The smoke lasted maybe 40 seconds and then I received an alarm for the battery charging system. The temp gauge went full hot and I received an engine overheating alarm just as I pulled into the gas station.
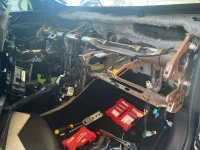
I parked to the side and let it cool off without looking under the hood first. It started right up but the temp went full hot again, so that’s when I looked under the hood. I saw the serpentine belt hanging down so I pulled it out and shut the hood. I reserved any further diagnosis until after I changed the belt, which I completed about 1:00PM today.
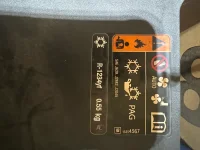
As soon as the clutch engages, the car will shut off. I think it’s pretty apparent the compressor needs to be replaced and the system will need to be evacuated and recharged. It may need to be flushed too. A new compressor is $250 and a system charge is $300. I don’t know how much extra it would be to evacuate the system and/or flush it. I would really like to find a heavy-duty compressor that fits my car. What do they use in police cruisers? They sit for long periods of time with the A/C running.
Yeah, these $500 and $600 repairs are getting really annoying.
My A/C compressor seized yesterday shortly after I left work and I ended up having to leave it overnight at a semi-shady gas station 15 miles from home. It started as a rough idle and quickly escalated to smoke coming from the right front wheel area. The smoke lasted maybe 40 seconds and then I received an alarm for the battery charging system. The temp gauge went full hot and I received an engine overheating alarm just as I pulled into the gas station.
I parked to the side and let it cool off without looking under the hood first. It started right up but the temp went full hot again, so that’s when I looked under the hood. I saw the serpentine belt hanging down so I pulled it out and shut the hood. I reserved any further diagnosis until after I changed the belt, which I completed about 1:00PM today.
As soon as the clutch engages, the car will shut off. I think it’s pretty apparent the compressor needs to be replaced and the system will need to be evacuated and recharged. It may need to be flushed too. A new compressor is $250 and a system charge is $300. I don’t know how much extra it would be to evacuate the system and/or flush it. I would really like to find a heavy-duty compressor that fits my car. What do they use in police cruisers? They sit for long periods of time with the A/C running.
Yeah, these $500 and $600 repairs are getting really annoying.