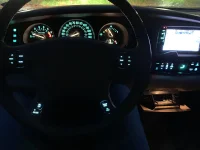
crank
New member
- Joined
- Nov 13, 2020
- Messages
- 5
- Reaction score
- 11
- Points
- 3
- Buick Ownership
- 2004 LeSabre
Hey there,
today I fixed some lights in my steering wheel controls and in the HVAC control unit.
I want to share my experience with you and hope it will help others.
UPDATE: I don't recommend doing it without removing the steering wheel! See Post #6
It's almost impossible to get them back in this way
I think light bulbs are not as reliable as LEDs so I decided to replace the light bulbs with SMD LEDs. I ordered cyan colored 0603 LEDs on eBay which match the color of the light bulbs very well J
First I was trying to use an allen key to pull the controls out. I ended up using a medium sized flathead screwdriver. Just stick it into the bottom of the control and pry it out. Be careful the wires are very tight and you will not have much room to push on the release tabs of the connectors. Take your time.
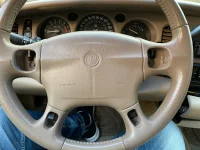
I also removed the HVAC control unit and went up to my apartment.
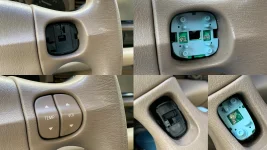
First I took the steering wheel controls apart. Just use a flathead screwdriver to release the tabs. Then I investigated the polarity (in case you want to use replacement light bulbs it doesn’t matter)
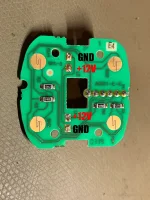
(temp/vol control)
I soldered a 1.5k Ohm resistor in series with the led to the pads. I had to use 45° to fit both to the pads
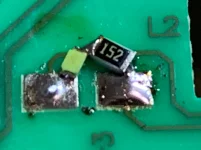
After soldering the temp/volume control I went back to the car for a test
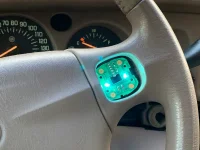
It worked and looked good so I went back up and soldered the other controls.
Here are the polarities marked for each control:
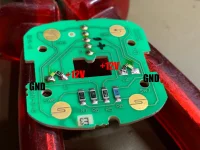
(seek/band/scan)
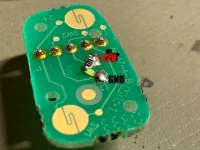
(accel/coarse)
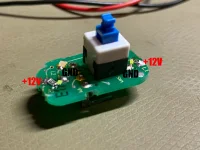
(cruise on/off)
After finishing the solder job I secured the LEDs with some hotglue to be safe.
Here is how the control looked like after reassembly:
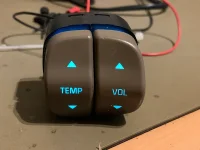
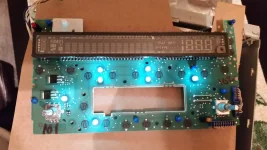
The steering wheel controls were done, so lets move on to the HVAC Module. I took it apart and went back to the car with my multimeter. After figuring out the polarities I desoldered the burned out light bulbs.
Here I marked the polarities.
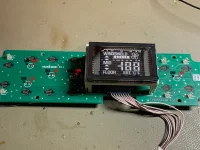
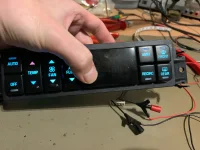
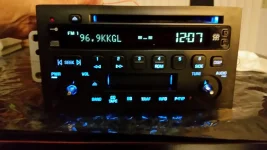
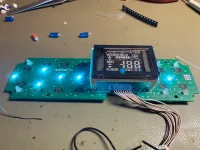
This time I used 1k Ohm resistors in series with the led. Here is a picture of my first test run:
I hope this little “guide” is helpful for someone
today I fixed some lights in my steering wheel controls and in the HVAC control unit.
I want to share my experience with you and hope it will help others.
UPDATE: I don't recommend doing it without removing the steering wheel! See Post #6
It's almost impossible to get them back in this way
I think light bulbs are not as reliable as LEDs so I decided to replace the light bulbs with SMD LEDs. I ordered cyan colored 0603 LEDs on eBay which match the color of the light bulbs very well J
First I was trying to use an allen key to pull the controls out. I ended up using a medium sized flathead screwdriver. Just stick it into the bottom of the control and pry it out. Be careful the wires are very tight and you will not have much room to push on the release tabs of the connectors. Take your time.

I also removed the HVAC control unit and went up to my apartment.
First I took the steering wheel controls apart. Just use a flathead screwdriver to release the tabs. Then I investigated the polarity (in case you want to use replacement light bulbs it doesn’t matter)

(temp/vol control)
I soldered a 1.5k Ohm resistor in series with the led to the pads. I had to use 45° to fit both to the pads

After soldering the temp/volume control I went back to the car for a test

It worked and looked good so I went back up and soldered the other controls.
Here are the polarities marked for each control:

(seek/band/scan)

(accel/coarse)

(cruise on/off)
After finishing the solder job I secured the LEDs with some hotglue to be safe.
Here is how the control looked like after reassembly:

The steering wheel controls were done, so lets move on to the HVAC Module. I took it apart and went back to the car with my multimeter. After figuring out the polarities I desoldered the burned out light bulbs.
Here I marked the polarities.

This time I used 1k Ohm resistors in series with the led. Here is a picture of my first test run:

I hope this little “guide” is helpful for someone
Last edited:


