Transgo shift kit and pistons too?

Finallyflying

Sustaining Member
Joined
Oct 25, 2020
Messages
60
Reaction score
29
Points
18
Location
Atlanta, GA
Buick Ownership
2001 LeSabre
I’ve read all the Transgo posts on here (I think! There’s a lot of them!) and I’m ordering the Transgo shift kit for my 2001 LeSabre (118K miles) which is having intermittent hard shifts.

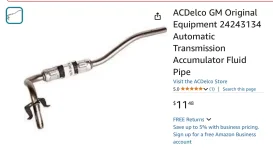
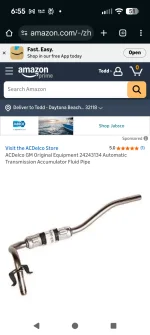
But, Transgo also sells the pistons and Sonnax has oversized accumulator pins. Do I just do the shift kit (and magnets, filter, fluid and 24243134 pipe) and see if that fixes the problem OR should I replace pistons and pins while I’m in there??
 
There’s a little metal clip also to keep the lines from backing out of the accumulator. It’s usually recommended also and I’ve done it on all the ones I did. I’ll look for the part number tonight. It’s a couple bucks. No need to replace pistons unless they have obvious damage or scoring (unlikely).
 
______________________________

Help support this site so it can continue supporting you!
There’s a little metal clip also to keep the lines from backing out of the accumulator. It’s usually recommended also and I’ve done it on all the ones I did. I’ll look for the part number tonight. It’s a couple bucks. No need to replace pistons unless they have obvious damage or scoring (unlikely).
Thanks! Do I still need the clip if im replacing the oem pipe with this one?
 

Attachments

  • IMG_4399.webp
    IMG_4399.webp
    38.7 KB · Views: 8
According to research I did maybe a years ago about this, problems with those pistons are a lot more common than people think. Question to ask, if that isn't a common problem, then why do companies make upgraded parts to fix it? I'm not saying to order parts without inspecting it first, but I definitely would inspect it.
 
I have not seen any evidence of problems with the pistons in any forum.
Why do they make them? Probably for people with the attitude of "while I'm in there".
When I did my shift kit the accumulator pistons were fine, the springs were definitely weak.
 
I'm not going to spend the time to go look it up, but if I remember correctly, the parts are upgrades, not factory replacement, which indicates a design deficiency from the factory to some degree.
 
______________________________

Help support this site so it can continue supporting you!
I've seen quite a few YouTube videos on the 4T65e transmission and no one ever mentioned a defect with the accumulator pistons or the need to replace them.
 
I just added a new posting to this forum for the trans servicing. I just did my 2000 Lesabre and added only the springs from the Transgo Kit. This is the 2nd trans I have done this to and never heard of anyone replacing the pistons. I added that Sonnex clamp and replaced the small line also. While you are in there you should add the larger round magnets. One goes on the pan where the original square one was and the other goes on the bottom of the new filter. There are many posts on this forum for the transmission if you search for them. My trans shifted just fine but I thought to do this trans flush and shift kit now to hopefully avoid any future issues. Time will tell.
 
I'm not going to spend the time to go look it up, but if I remember correctly, the parts are upgrades, not factory replacement, which indicates a design deficiency from the factory to some degree.

Were you, by chance, thinking of the main line pressure accumulator valve? It looks like a piston.

I can envision the original pistons in the valve body getting worn and sloppy, so someone may make tighter fitting replacements.

I just did a full trans flush, updated magnets and GM filter so I’m hoping to avoid having to drop the pan again to add the shift kit components.
 
______________________________

Help support this site so it can continue supporting you!
Thanks all for the info. I did the shift kit (springs and spacers only), pistons and bores looked fine, new filter and seal, new magnets, and the Sonnex line clip.

The new design pipe is no longer available (at least I couldn’t find it), so I replaced the 5/16ths rubber hose with new clips and reused the two metal pipe sections.

I was hesitant to tackle this job at first, but it really was fairly straightforward with all the tips on here plus a few youtube videos.

The car drives great now! Shifts are smooth but solid, the trans no longer jerks when shifting from park into R or D, and if you punch it the downshift is downright awesome- really crisp and solid.

Thanks again for all the info on this forum!
 
Thanks! Do I still need the clip if im replacing the oem pipe with this one?
Did you ever replace the OEM pipe with this one? Could you give me instructions or a link to a video or step by step guide on a website for the install of this item? I bought the item on recommendation but don't know how to install it. I'm doing the shift kit and filter and magnets so I thought I might as well spend another 20 and do the pipe
 

Attachments

  • Screenshot_20251010-185554.webp
    Screenshot_20251010-185554.webp
    53.8 KB · Views: 2
No, the pipe that I ordered arrived extremely rusted, am guessing it had been sitting in a damp warehouse for a long time. So I used the rubber hose part off the new one, but re-used my old metal pieces as there wasn’t anything wrong with them. This youtube video shows the pipes pretty good. It will all make sense once you get it opened up. And also, I highly recommend siphoning out as much fluid as you can before dropping the pan. Makes much less mess but have your drain pan ready to go as there is still a lot of fluid that will come out. It’s messy, but im almost 15,000 miles later and it still shifts perfectly. Never thought these little springs would make such a difference but they do.

Oh and just to clarify, I never found the new design pipe like you found so thats why I stayed with the original and just replaced the rubber part and installed the stabilizing clip. Hope this helps!

Is it one of the pipes that pull out of the accumulator? One of the ones that get clamped with the sonnax part?
 
______________________________

Help support this site so it can continue supporting you!
Does that part just pull out with no tools? Is there any type of o-rings or seal in there? Do you have to clean the bore before installing?
 
So, the end in the valve body just pushes in/out. It's a pretty loose fit from what I remember which is why the new clamp holding the two pipes together is suggested. The end in the transmission case does have a small spring clamp with two "ears" on it. Just mash them together with your fingers and it comes right out. It's the circled part in the two photos below. I can't quite remember, but I might have used a pair of pliers to gently squeeze it together so the pipe will drop out.


IMG_4429.webp

IMG_4651.webp
 
So, the end in the valve body just pushes in/out. It's a pretty loose fit from what I remember which is why the new clamp holding the two pipes together is suggested. The end in the transmission case does have a small spring clamp with two "ears" on it. Just mash them together with your fingers and it comes right out. It's the circled part in the two photos below. I can't quite remember, but I might have used a pair of pliers to gently squeeze it together so the pipe will drop out.


View attachment 49449

View attachment 49450
Thank you that's exactly what I needed to know. I'm also on my way to doing lower intake gasket, upper intake replacement, coolant elbows and tensioner and valve cover gasket. This is a second car my daily driver fortunately doesn't need any repairs at the moment so the lesabre is a fun project I get to do on my spare time and I love the car a lot
 
Back
Top