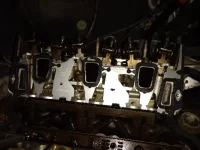
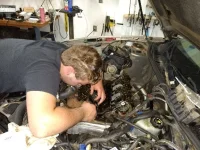
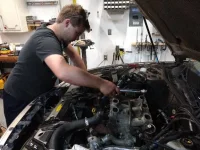
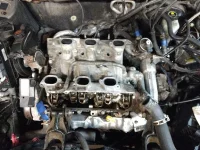
Another new member with a 2000 Century

Yes, Buicks were on the front, angled towards the driver's side. This drove an oil pump on the passenger's side in the timing cover.
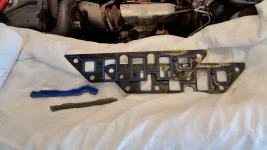
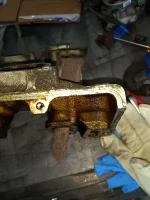
The plastic gaskets were original and some GM replacements. Some of the 3100 / 3400 series did get an improved GM replacement gaskets, but the Fel Pro's are a better design for most.
 
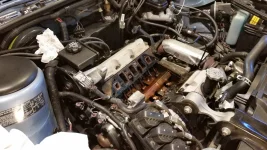
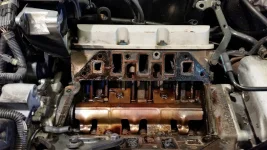
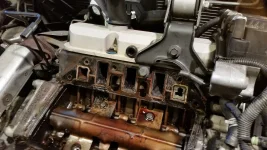
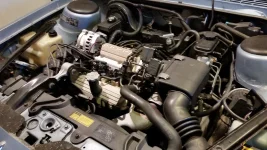
Sadly, the genuine Buick engines got a similar, but not quite as bad, plastic carrier gaskets. There aren't any improved versions for these either. This is a '92 3300 V6. About 225K miles when I replaced the intake gaskets. Far easier to service than the 3100 V6.

16470

16471

16472

16473
 
That 3300 looks a lot more conventional. At work I had to take a design for manufacturing and assembly class. The Buick engineers of the 2000 year generation should have taken that class as well. Very hard to work on.
 
The older A-body ('82-'96) is easier to service, IMHO, than your '97-'05 car, but I have been stunned at the difficulty in servicing 3100 compared to the 3300. Never dreamed this would be the case, as the 3300 is a 90 degree V6, but I believe it may be smaller in every external dimension. It only took me 1 hour and 25 minutes (excluding draining radiator) to go from this;

16476

to fully disassembled as shown in previous post. You can even drop the oil pan from the 3300 without removing the starter! Did that as an after thought when I preventively replaced the timing chain in the 3300 at 200K miles.
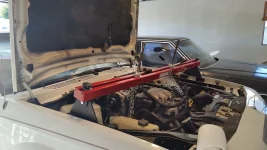
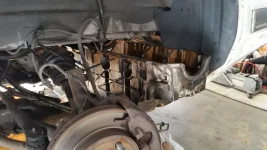
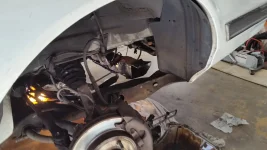
Don't know if it is still the case with your body style, but the oil pan cannot be removed with the engine (or engine cradle) in place with the 3100. I refused to believe the shop manual on this one, and had to get very creative;
16478

16479

16480

I have lovingly come to refer to it as being as difficult as servicing a Cadillac Northstar.
 
______________________________

Help support this site so it can continue supporting you!
I sandblasted this coolant tube as it had many rust spots.
IMG_20190622_135520660.webp

Then I painted it. I also did this to the short tube that comes out of the thermostat housing.
IMG_20190622_142055773.webp

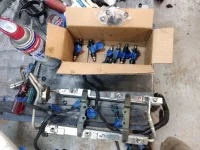
The injectors were a bear to get out. Out of the 6 injectors, 5 of them had the plastic tip popped off and I had to fish them out from on top of the intake valve. The #3 injector pulled off the fuel rail and its plastic tip was half off. I am cleaning up the lower intake and here I have a strip of scotchbrite run through the injector hole.
IMG_20190622_155021750.webp

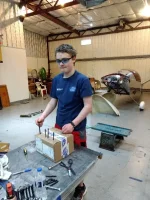
Headed back over to have my kid yank the pushrods. This is his congratulations on the driver's license cake. The Buick will be his car.drivers license cake.webp
 
Loosening up rocker arms:
pop off rockers.webp

Keep sorted as you go:
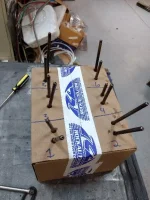
pushrod keeper.webp

All pushrods out:
pushrods all out.webp

Gaskets out:
old plastic gaskets.webp

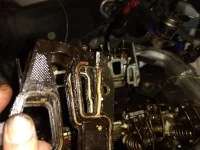
Failed gasket:
gasket failure.webp

Time for left over steak.
 
Nice new metal fel-pro gasket:
full metal gasket.webp

Pushrods going back in:
pushrods going in.webp

Torquing manifold:
torquing manifold.webp

Manifold in. Calling it a night.
manifold on.webp

I spent a lot of time cleaning that manifold. It was a pain.
 
My wife was not feeling well today so I didn't get much done. But I did clean off the injectors with WD-40, replace the o-rings, and get the fuel rails back on.
IMG_20190623_173110903.webp

I was worried about this step as they were very hard to get out. This time the bores in the manifold were clean. I used EZ-turn as a lubricant. I use that stuff on aircraft fuel systems and I did use it on my Saturn. It went in very easy. Whew.
IMG_20190623_181816746.webp

I was not brave enough to pop the coolant drain holes in the block. Too rusty looking and hard to get at. I used my brake vacuum bleeder to suck coolant out of the heater core, radiator, and down through the head before we did the gaskets.
 
______________________________

Help support this site so it can continue supporting you!
Never had the block drains out of ours either, though it is clean inside. Too hard to get to on the back side of the block anyway.
 
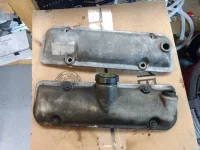
I went back over and cleaned up the valve covers. My gasket set had new rubber bushing for the bolts. My go-to solvent for this stuff is usually WD-40. Not too toxic, cheap, does a decent job. Here is a before and after picture.
IMG_20190623_205159805.webp

Question: there is a notch under the valve cover where the intake and head meet. Is it customary to use a small blob of RTV at this spot?
 
I went back over and cleaned up the valve covers. My gasket set had new rubber bushing for the bolts. My go-to solvent for this stuff is usually WD-40. Not too toxic, cheap, does a decent job. Here is a before and after picture.
View attachment 16515

Question: there is a notch under the valve cover where the intake and head meet. Is it customary to use a small blob of RTV at this spot?

Absolutely, and I did as well.
I still think of Ford FE V8 when I see these engines apart with the valve covers over part of the intake manifold.
 
No pictures tonight. What we accomplished:
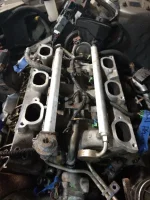
1) Reinstalled the plenum.
2) Reinstalled the short coolant tube that goes from the thermostat housing to the heater core. I had that out to paint it.
3) Reinstalled the EGR valve. Adam dropped one of the bolts and we couldn't find it, so we used one of the old short manifold bolts.
4) Swapped the coolant level sensor with the junkyard one. I hope it works.
5) The negative battery bolt and terminal were messed up. I drilled through the old bolt and made it into a thick washer, so I could use a normal 3/8" bolt and get another couple of threads in the battery.

Also on my way home I had another two sets of keys made up. I bought resistor keys off of eBay as someone suggested here and took the to the hardware store. The keys work mechanically, hope I did a good job picking the resistor value.
 
______________________________

Help support this site so it can continue supporting you!
Question: the left fuel pipe in the picture below seems loose. The fitting is tight as I never broke it. Is that ok?
img_20190623_181816746-jpg.16509


It is the pipe under the vacuum thing.
 
My fuel pipe did not leak when we primed it. Yay!
Next question: does the crank position sensor 7x plug into the coil pack?
 
My fuel pipe did not leak when we primed it. Yay!
Next question: does the crank position sensor 7x plug into the coil pack?

Yes, directly into the ICM. It controls the engine before the ECU takes over (w/24x CPS) after start up, above xxx (can't recall exact #) RPM.
 
Last edited:
We had our Buick rollout this evening.
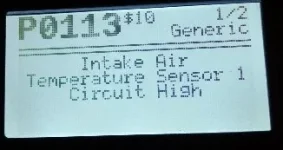
Don't worry about the coolant on the floor, that was a spill. I cleaned the floor after they backed up so we could look for other leaks. We broke the coolant bleeder on the passenger side. I just screwed out the whole plug before it got too hot. The coolant low light used to be stuck on. I swapped in a junkyard sensor and it seems to work. During our first short cruise the low coolant light was on and off. We found the reservoir had gotten low as the air worked its way out. Still topped off at the radiator. After we topped the reservoir no more light. We also had one check engine light and a code:
IMG_20190627_221325339.webp

We cleared it and it has not returned. We have had the car to 60. It accelerates well at full throttle. The transmission seemed slippy on one of those tests but we have not changed the fluid and filter yet. We are going to pull and inspect the calipers tomorrow and bleed the brakes one more time.

My total investment right now is about $900. The car was $200, the uhaul trailer was $62, and the rest was parts and fluids. From memory here is my list:
New and installed: oil, oil filter, plugs, wires, air filter, serpentine belt, fuel filter, rubber brake hoses, nicopp 3/16" brake line, nicopp 3/8" fuel line, wheel cylinders, banjo bolts, resistor keys x 2 (they both work!), Brake fluid, antifreeze.

From the junkyard: fuel line section, master cylinder to ABS controller lines.

Bought but not done yet: key fobs (need to be programmed), trans fluid, pan gasket, and filter, refrigerant with UV dye.

Fabricated: fuel filter bracket, main fuel line, all hard brake lines, longer bolt for a stripped battery terminal.

Now to start driving it....
 
and time with the boys - Invaluable 👍

I even got my little girl to go the the Pull-a-Part with me a few times for her Century.
 
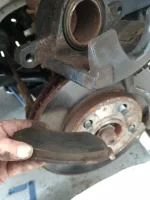
We replaced the license plate bulbs as they were burned out. We popped off the calipers and they were good. They must had just been serviced before they took the car off the road. Pistons were not frozen and lots of meat on the pads.
IMG_20190628_142236300.jpg

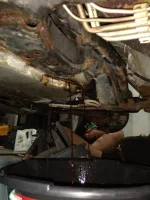
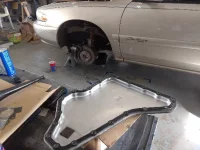
We dropped the pan and drained the transmission. The fluid that came out looked and smelled bad.
IMG_20190628_135948456.jpg

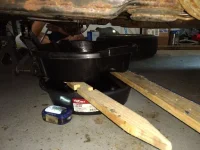
A 7 quart pan is not enough. Here was my clever way to keep going without spills.
IMG_20190628_141036834.jpg

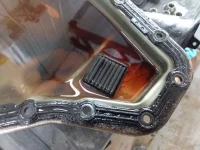
I actually managed to spill plenty. I used an entire roll of paper towels to deal with the catastrophic spills from the final drop of the pan and removing the filter. Here is the pan and you can see the ribbed magnet:
IMG_20190628_153020272.jpg

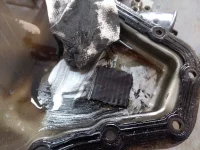
It's not actually ribbed. That is metal. My '99 Saturn magnet looked like that too. Here it is wiped off.
IMG_20190628_153347556.jpg

And now clean, with a new gasket. We lost one of the hundred or so M6 bolts that holds the pan on.
IMG_20190628_170056865.jpg

I also topped off the tank and we took the family for a short spin. The boys finished bleeding the brakes while I worked on the pan and my Exxon Valdez sized oil spill.

My outside air temperature reads 46 F. Anybody have experience with that error? Is it related to my inlet air temperature check engine light?
 
The transmission pan doesn't look too bad. Pretty comparable to what I have seen on our '96 4T60E. It sheds more clutch material than anything I have seen that is actually working well. What is funny to me, is the older, non-electronic 4T60 in the '92 is exceptionally clean running.

I would guess the air temp errors may be related.
 
Back
Top