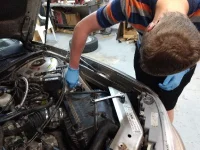
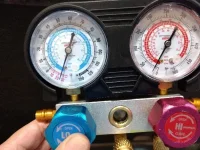
Another new member with a 2000 Century

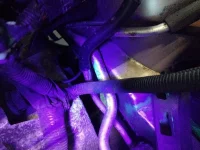
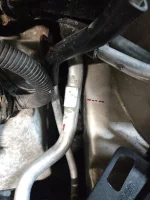
No glowing firewall. I assume this elbow is the drain.
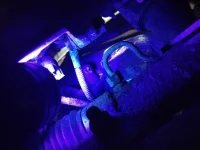
no drain leak.webp

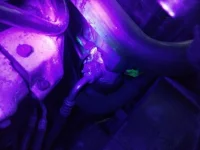
Here is our high side valve. I had it cleaned off pretty good, and the glowing green came back.
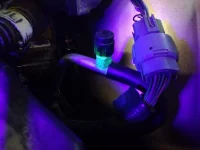
small high side leak.webp

Here Matthew is putting on the valve core removal tool.
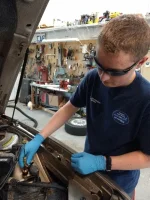
installing valve core tool.webp

Then we found out there is no valve core. Just a ball thing like one of you guys mentioned.
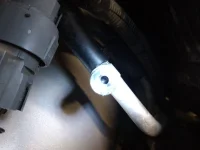
ball not Schrader.webp

So I joggled the ball around and got it to stop leaking, I think. We recharged the refrigerant and we will see what happens tomorrow.
 
The seal ball usually feels like it's got some sort of spring tension keeping it pinned closed.

Low side port should work in the same way.
 
That's great to see, I understand the evaporator is a real pain to change.
Interesting story on those rubber elbows. When those are missing, some of the GM body styles will develop enough pressure from the air flow at highway speed to keep the condensation from from dripping. Some could overflow into the interior when traveling non-stop, in humid conditions.
Fortunately, everything I have is so old it just drips from a drain hole in the evaporator case, under the hood, where it belongs. Removing the evaporator from the interior of my '65 Corvair years ago looks like nothing compared to any 1990s+ GM (and everyone else's) designs.
 
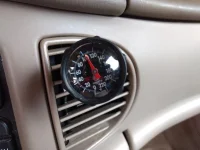
The air out the vent was 40F this morning. I was freezing but left it on in the name of science. Was only 70F outside.

Corvairs are cool. The airplane I'm building has a bug motor in it but some people build them with Corvair motors.
 
______________________________

Help support this site so it can continue supporting you!
It has been about 22 hours since the recharge. Here was the temp when I got in the car after work:
IMG_20190717_175014951.webp

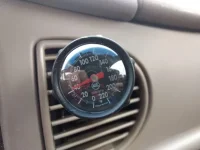
And in my driveway at home:
IMG_20190717_181650981.webp

Seems like success! Hope it holds.
 
That's awesome and is what I have seen with my experience in V5s with with R134a refrigerant control valves.
 
So this AM the air was cool, but not as cold as yesterday. I think I have a high and low side port replacement in my future. Should I get those same stupid ball valves or get aftermarket schraeder valves?
 
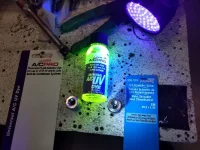
Try 3 on getting the air to work. Here is my new aftermarket high side valve with a conventional schraeder valve. Also I bought more dye and am showing off my blacklight.
new parts for high side.webp

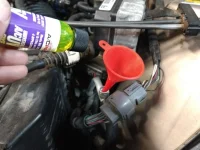
With the old high side valve out, here I am putting in some dye.
dye insertion.webp

Next Matthew is putting in the new valve.
install high side valve.webp

We have a vacuum pulled on the system and will see how it does overnight.
vaccio.webp

We also put a new AC Delco low side schraeder valve in.
 
______________________________

Help support this site so it can continue supporting you!
I hope you get the AC running right. I lived 1 summer without AC in the car and I hated it !
 
We held vacuum overnight. Charged the system after dinner. 42F air out of the vents! But 10 minutes into the test drive the cold air stopped and the clutch is not engaged. Question, if the car thinks it's below 60F in the car does it disengage the clutch? I have one of those newfangled automated climate control systems. My outside air temperature reads 33F tonight.

So far I've checked the AC clutch fuse and verified no UV dye explosions under the hood.
 
I'm guessing you are correct, but I don't know from my experience. The '96 (OBDII) we have relies exclusively on what the ECU reads from the high side transducer on the refrigeration system (besides having what were essentially 'lifetime' control heads with vacuum and cable operated blend doors).
 
I did a little reading and discovered there is a manual mode. Just don't hit the auto button, and turn off the vent off, if it is on. Adjust the fan as required. So it is working this AM.

I guess the vent on light can also be interpreted as a compressor off light.
 
______________________________

Help support this site so it can continue supporting you!
Sounds like the ECU still interprets the signal from the transducer for radiator/condenser fan and compressor control then, but the control head does not command refrigeration if the outside temp is below 'x' degrees in Auto.
 
Aaaaaand no more cold air. I'll check for UV dye and if I don't see anything I'll buy one of those freon sniffers.
 
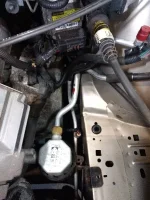
I think I see fresh dye. I am going to pull off the air box and clean the old dye off. See the glowing corner on this tube? This is fresh I think.
IMG_20190804_202938506.webp
 
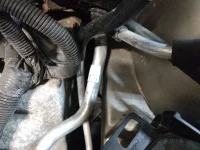
I found a suspicious spot upstream on that tube.
green leak.webp

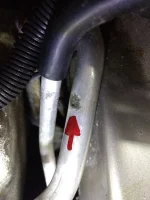
Here is a zoomed out, natural light picture. I marked it with a red arrow.
chafe wide view.webp

If you look closer it was chafing, is rusty, and there was a bunch of dye. Also a noticeable divot in the tube.
chafe closeup.webp

Now to recharge it and look for dye again. We cleaned up all the old dye.
 
______________________________

Help support this site so it can continue supporting you!
Once you get this AC sorted you'll be as good at it as the best of the pro's.
 
So I can't find that part new. It seems I have 3 options:
1) find a good part from the junkyard.
2) cut and splice the tube, with an AN union or one of the compression unions they sell for this purpose.
3) do some sort of adhesive based repair on the outside.

Anybody have any experience?
 
I went the wrecking yard route with my Caprice years ago, but it was cheap and easy. Mine wasn't leaking, but had a spot worn noticeably thin. I was afraid of the other options, especially running R12.
The liquid line seems to be the first part discontinued of the A/C system, and not available aftermarket. I got a brand new (not NOS) hose set for the car at the same time (IIRC). Since it is an early '84, it still had the old style hoses and crimps. GM switched to better crimps and R134a compatible 'Goodyear Galaxy' hoses mid '84 production (believe it or not).
 
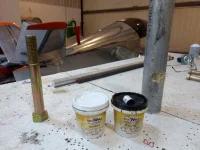
I checked my pressure tonight. It was down to 10psi static. I accidentally mishandled the gauge connection and now it is zero. Before I recharged the system, I decided to try and patch the liquid line. You need the right stuff. The inside of a Mr. Clean mop handle is about .75 ID. It is steel. I hacked off a piece. Metlweld is the aviation form of JB Weld.
IMG_20190808_211626356.webp

Here is a dry fit.
IMG_20190808_211700734.webp

I cleaned off both pieces really well, first with sandpaper and then acetone. Then I glopped on the metlweld and stuck on the hunk of the Mr. Clean mop handle.
IMG_20190808_220804583.webp

I'll let it dry for 24 hours, then reassemble the air box. Then I'll pull a vacuum on it for 24 hours.

Should I put in more UV dye? My current leak is slow.
 
Back
Top