• This section is for help and assistance with 2018 and NEWER Buick Regals. If you need assistance with a 2011-2017 Buick Regal, CLICK HERE. If you need assistance with a 2010 or older Buick Regal, CLICK HERE. This notice may be dismissed by clicking the X in the right corner.
  • Car enthusiast? Join us on Cars Connected! iOS | Android | Desktop

Installed spare tire for 2018 essence today

cleeland

Member
Joined
Nov 30, 2021
Messages
79
Reaction score
32
Points
18
Location
STL MO
Buick Ownership
2018 Regal TourX Essence
Anticipating a long road trip in the spring, I spent several hours this past weekend mining spare tire parts from various self-serve junkyards in the STL area. Ended up with
  • a 125/70R17 from a 2009 Cadillac CTS (this is the same size spec'd in the Opel wagon verified from the tech specs in their manual)
  • a jack from an unknown vehicle (was in the box-o-jacks inside the yard office)
  • a folding reflective triangle
  • a bag to hold the punctured tire (from a volvo)

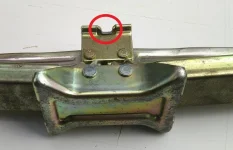
Weather was nice today, so I took an extended WFH lunch hour to install. I chose not to preserve the existing foam in case I ever wanted to return to stock form, and instead used a combination of butchered pool noodle, an old bike tire, and hacked up foam from the Caddy. Results are shown in the pics. I verified that the jack would lift the car sufficiently to pull the wheel, and that the lug wrench fit the lug nuts.

IMG_1891.webpIMG_1892.webpIMG_1894.webp
 
Nicely done- I just put foamy floor mat under it(until late where I was dealing with water in there).
 
Nicely done- I just put foamy floor mat under it(until late where I was dealing with water in there).
I was going to go that route, but the proclivity for these to collect water in the well and my wife's mold allergies suggested I should spend a little more time.
 
I was going to go that route, but the proclivity for these to collect water in the well and my wife's mold allergies suggested I should spend a little more time.
If you fix the water entry points you should be good. Mine started letting water in after 2 years or so.
 
______________________________

Help support this site so it can continue supporting you!
If you fix the water entry points you should be good. Mine started letting water in after 2 years or so.
Could you elaborate on what needs to be done to fix the entry points? I’d like to address the issue while I’m soundproofing the hatch and I have all of the panels removed. I assume the vents in the rear of the hatch are one of the entry points.
 
Could you elaborate on what needs to be done to fix the entry points? I’d like to address the issue while I’m soundproofing the hatch and I have all of the panels removed. I assume the vents in the rear of the hatch are one of the entry points.
Vents were not an issue on mine. Just chrome trim ( two torx bolts on each side) mounting nuts and taillights mounting.
 
Vents were not an issue on mine. Just chrome trim ( two torx bolts on each side) mounting nuts and taillights mounting.
Thanks! I’ll take a look at the trim and taillights. The vents kinda bother me, especially the one on the passenger side. The Bose amp appears to be somewhat resistant to moisture, but the Axxess modules I installed in place of the amp are plastic and contain visible circuit boards.

I drove home in a monsoon last week. Wipers on high the whole time and never exceeded 35 mph. If nothing got wet because of that I guess I’m good.
 
Could you elaborate on what needs to be done to fix the entry points?
Not sure if you're on facebook, or if you even need to be a member of the FB TourX group to see this post, but a member there posted some good info about a week or so ago, complete with some pics.

 
______________________________

Help support this site so it can continue supporting you!
I just done this with my Sportback. Photos to come. It's a snug fit but everything fits under the rear floor nicely.
 
  • Like
Reactions: D2R
Not sure if you're on facebook, or if you even need to be a member of the FB TourX group to see this post, but a member there posted some good info about a week or so ago, complete with some pics.

Definitely interested in this info, but not a FB member - but I can't see it from that link to FB. I wonder if that info could be put on this (non FB) Forum?
 
Definitely interested in this info, but not a FB member - but I can't see it from that link to FB. I wonder if that info could be put on this (non FB) Forum?
I just checked and you have to be a member of the group to see any posts. I was going to ask them if I could post the info in our forum for those who don’t use Facebook.

Maybe someone else can do it because I don’t really want to join the group.
 
If I'd made the original post, I'd definitely cross-post here. The gist is that the trim on the D pillar inside the rear hatch is held on by 2 torx screws that screw into plastic clips that pop into holes cut into the body panel. These clips have a very small amount of compressible foam gasket on the underside of the face to serve as a seal btw. the clip and the body panel. This gasket compresses over time and permits water to get through.

The original post references this part number: 25704358 (also available at GM Parts Direct), and offers this photo. Folks on that thread were simply putting a bead of silicone sealant under in place of the gasket. I will likely pull mine and use some 3M caulk-seal since it's more easily reversed, designed for exactly this purpose, and I have some in the basement.
Screen Shot 2021-12-15 at 9.56.38 AM.webp
 
______________________________

Help support this site so it can continue supporting you!
Another member of that FB group went through a protracted adventure with a dealer, and the water ingress area turned out to be an incomplete seal at a body seam under some trim below the cargo area side window. Finding and fixing that required a lot more diagnosis and involvement from Buick customer care. Way too long of a thread to post (and also not mine), but filled with a lot of great detail. I'd say that if sealing the clips above doesn't address your water issues, join the FB group long enough to chase this link: Buick Regal TourX Group
 
If I'd made the original post, I'd definitely cross-post here. The gist is that the trim on the D pillar inside the rear hatch is held on by 2 torx screws that screw into plastic clips that pop into holes cut into the body panel. These clips have a very small amount of compressible foam gasket on the underside of the face to serve as a seal btw. the clip and the body panel. This gasket compresses over time and permits water to get through.

The original post references this part number: 25704358 (also available at GM Parts Direct), and offers this photo. Folks on that thread were simply putting a bead of silicone sealant under in place of the gasket. I will likely pull mine and use some 3M caulk-seal since it's more easily reversed, designed for exactly this purpose, and I have some in the basement.
View attachment 34711
Good stuff! Really appreciate it. I will probably replace the gasket with some Neoprene and also seal it with silicone or form-a-gasket. I’ll also take some pics and post back here.
 
I will probably replace the gasket with some Neoprene and also seal it with silicone or form-a-gasket. I’ll also take some pics and post back here.
Honestly, buying a box of 3m strip-caulk will be $25 you will never regret. I bought a box of this stuff probably 20 years ago and still haven't gone through all of it. This is exactly the kind of job it was designed to do. Super handy for reattaching door vapor seals, adding between plastic panels that rub and creak, etc. etc. etc.

 
Just go easy when you are doing the job. I did mine without removing the trim, but you need to be careful not to break it. Do it in warm garage. I also did taillights nuts with gaskets, but I don't see them being an issue.
 
______________________________

Help support this site so it can continue supporting you!
I originally started my story about fitting a space saver spare in this thread SpareTire

Since this thread is more recent I will post my update here.

I have fitted the space saver tyre in to the cavity and made up foam rubber holders for the tyre accessories.

I bought an as new second hand space saver wheel for a ZB Commodore (Buick Regal) plus a second hand jack and wheel spanner from a VY Commodore. The wheel spanner being the correct size for the wheel nuts on the ZB. The jack needed a minor modification to allow the lifting pad to fit between the lifting notches on the chassis of the car.

Here are photos of my results.

I
The modification to the jack lifting pad circled in red. The width of the pad has been reduced by grinding away some of the pad.


Foam Cases 30% rotated cropped.jpg
The foam cases I made out of 10 mm and 20 mm thick foam. I cut the shapes in each layer then glued the layers together with Ados F2 contact adhesive.


Rubber Pads and Rub Strip 30% rotated.jpg
The spare wheel cavity showing the rubber support pads and the rub strip. The support pads align with the circular ridge on the rim. Their placement allows the rim to be pushed down at the front when removing the wheel from the cavity otherwise there isn't enough clearance at the rear of the cavity to remove the wheel. As it is now, it is a very tight fit between the tyre and the plastic trim below the opening of the hatch, (where the latch is located). See last photo below.


Finished Installtion 30%.JPG
The finished installation. Note the Goo bottle is on the bottom right wrapped on bubble wrap. I haven't yet made the case for that.

You will note how tight the fit is between the tyre and the plastic trim at the bottom of the photo. The trim has to be pressed towards the rear of the car to get the wheel to slide past the trim when you need to remove the wheel.

I'm pretty happy with the result. It is tidy and functional.
 

Attachments

  • Jack 30% highlight cropped.webp
    Jack 30% highlight cropped.webp
    65.8 KB · Views: 48
Last edited:
Nice! Thanks for posting w good pics. I'm inspired to improve mine
 
If you want more detail on what I did let me know. I have other photos. For example the foam for the pump has been shaped to take into account the slope of the wheel as it lies in the wheel cavity, plus I cut a small groove on one side to fit around the frame that runs across the front of the cavity. Just small things to get a neater fit.
 
This is the solution that I am looking for. I own a TourX and live in Germany. I assume that there are similar parts for Insignia models over here.
 
Back
Top