Cadillac 12" Full Digital Cluster...You guessed it, in a 12 Regal GS

When there's a will, there's a sawzall. 😛

I prefer an angle grinder

attachment.php

attachment.php

attachment.php

attachment.php
 

Attachments

  • image.webp
    image.webp
    61.9 KB · Views: 326
  • image.webp
    image.webp
    76.9 KB · Views: 323
  • image.webp
    image.webp
    71.5 KB · Views: 322
  • image.webp
    image.webp
    69.6 KB · Views: 326
Having gone through some steel poles in the yard.....that would do a pretty good job on plastic.

Like butter.

I love using it on acrylic. It is the only thing I have found that can reliably cut thick acrylic without cracking it.

Friction vs Tearing.

Angle grinder relies on friction to cut. Friction generates heat. Thus weakening the material and allowing it to be removed from the cutting area in a weakened more malleable state.

Saws grab and tear. Acrylic has ZERO tensile strength so it snaps and cracks instantly.
I get a perfect cut every time with my grinder. It is by far the most useful tool in my arsenal.
 
Saws grab and tear. Acrylic has ZERO tensile strength so it snaps and cracks instantly.
I get a perfect cut every time with my grinder. It is by far the most useful tool in my arsenal.

Had no clue. I assume a dremel would be good for smaller jobs also.
 
Had no clue. I assume a dremel would be good for smaller jobs also.

Not enough torque at low speed. It binds up.

So there is no way in hell it will fit with the factory enclosure. So I started prototyping...

Burnz, grinder, old cluster as a template.

Heated square piece of .231" thick acrylic with the torch to soften it to that of a cloth towel.
If you're following at home kids, this takes time. Never stop moving the torch on the acrylic. Always figure 8, back and forth, up down...doesn't matter. Start with the outsides and work your way in. This will focus the heat towards the center. But as you heat the center be sure to hop back to the outer parts to keep them up to temp. For a room temperature piece be expected to heat for a solid 10-15 minutes before seeing results. Remember: heat the acrylic on a flat board, concrete, or something that can withstand the heat that ISNT metal. Metal will pull your heat out of your work piece and make it harder to maintain temp.

After you do this, get gloves...good ones. Be sure you also have something to mold the acrylic with. I used a bottle of wire lube...no puns, it was just a good size to work as a roller back and forth on the acrylic after laying it over the mold.

I put painters tape, then layers of gorilla tape over the cluster being used as a mold to protect its acrylic front panel from the radiant heat of the work piece.

You should end up with something that looks like this:

image.webp

image.webp

After is cools, trace out the general shape and cut it out. I prefer the grinder.

image.webp
image.webp
image.webp

After cutting out your shape, clean up the edges with a sander or grinder.
Repeat heating and molding step to get an even more uniform fit and shape.

Your acrylic might look like dog shit, but it doesn't matter. This is a prototype for me. Nothing that a bit of polishing won't clean up. Keep in mind you'll have to work your way up to 200k grit leaping paste, finishing it off with a quick flame polish. ....I never said this was easy ��

More fun to come
 
______________________________

Help support this site so it can continue supporting you!
An oven works really well for acrylic. I do some of my best work in the kitchen!
 
Oh damn... this is nice. Much respect for the fabwork involved here.

Best part is showing this kind of thing to my old man who works at the Milford Proving Grounds. He'll say it couldn't be done. It simply doesn't bolt up.
 
Did you get this in?

It is wired in and working, but not gracefully.

Oh damn... this is nice. Much respect for the fabwork involved here.

Best part is showing this kind of thing to my old man who works at the Milford Proving Grounds. He'll say it couldn't be done. It simply doesn't bolt up.

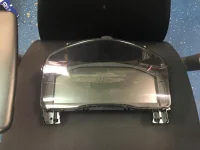
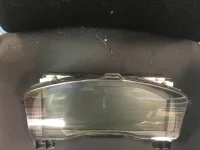
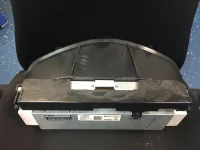
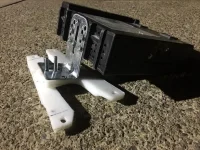
Not at all. I have it stripped down to the bare LCD and even that was too big. I had to hack up my dash...quite a lot. Nothing that some fiberglass, black vinyl die, and a trip to the craft store cant mend but I had to cut so much out it that I was honestly thinking of scrapping the project and buying a new dash. But at the last second! When I thought all hope was lost...I finally was able to consistently get the display in/out and seating pretty nicely.

Materials you will need: files, hack saw blades, very sharp blades for your box cutter, a very very very steady hand, heat gun, hot glue gun, and various other grabbing, cutting, and plastic prototyping tools...[would not recommend cyanoacrylate...it bonds very well to the Acrylonitrile Butadiene Styrene that makes up the housing and skeleton of the cluster, but the fumes from the CA will destroy the vinyl dash and the LCD itself...not worth it in my opinion]...Behind the vinyl is a polyPropylene shell that gives it support, this is where you will need the heat gun, stead hand, and sharp knife to cut a smooth consistent edge...sawing will destroy your edge and leave you with a very unsightly final product as will heating too much with the heatgun...so keep it moving. Hot glue is your best friend with an interior. It is strong enough for mile loads, bonds to almost anything, and if you have adjustable heat on your glue gun you wont ever damage the plastic while being able to very very accurately control viscosity to get the perfect seam every time. Totally under rated. I use it for everything from potting electrical connections, casting molds, to tacking things like that screen in place while I glass around it to make a smooth molded surround (make it look like an actual cluster again lol).

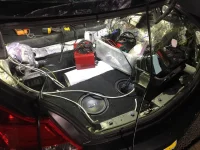
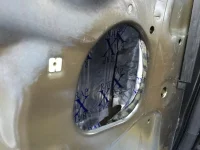
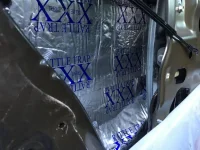
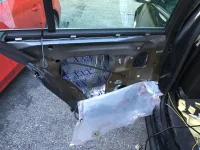
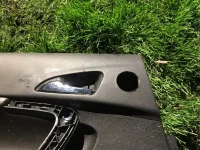
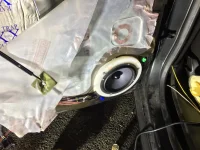
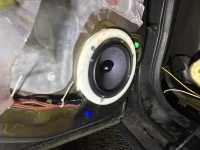
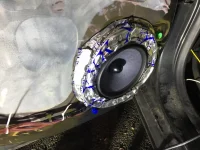
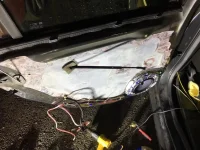
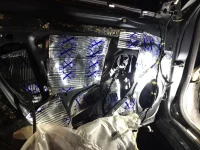
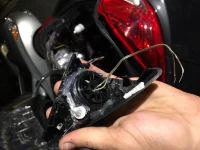
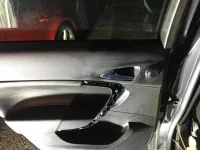
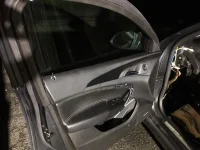
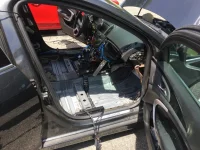
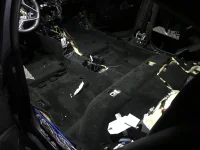
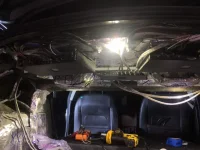
This was months ago though. I have been concentrating on other parts of the car for the most part. Pulled the interior for sound deadening and running of the harness for the IO6 swap. Along with tearing all the doors apart, building speaker baffles, fully deadening the doors, installing speakers+tweeters, making mounting brackets for control modules, taking hole saws to my rear door panels (for the tweeters), while front doors casting the tweeter into the factory enclosure with hot glue for a completely stealth install ...and all other kinds of fun shit.

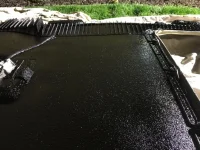
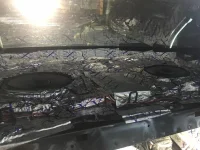
Sprayed the headliner with liquid deadener, this added a decent amount of heft to the liner and I had to reenforce the velcro mounts with additional high strength velcro. To help road noise in addition to matting both the roof and floors. The entire trunk was done as well. All with 80mil RattleTrap cut to fit, heated to melting point with a heat gun, then rolled on to ensure it will never let go and rattle/collapse the interior carpets.

I finally fixed my driver seat heater after months of putting it off (it actually isnt that bad) for those whos seat heaters crap out on them, 80 bucks for both elements and 2-3 hours of your time.

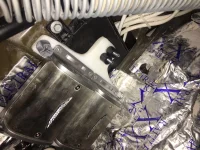
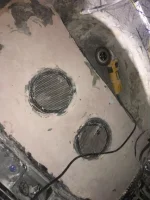
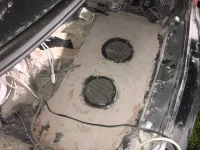
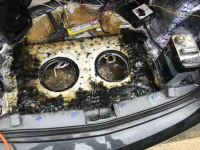
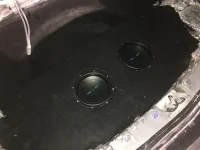
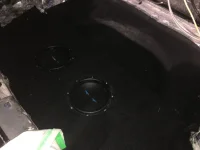
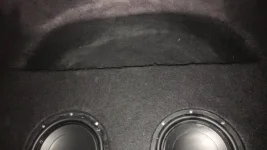
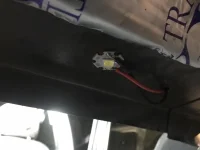
And finally, since the GS doesnt come with a spare, I Built in some ID8s into a custom fiberglass/High Density Polyethylene sealed enclosure. The ID8s are recessed so the factory trunk floor mat will lay right down on top with some velcro to make sure it is held in place to prevent rattling. The AMPs (two Arc XDi1100.5 and PS8 DSP) are mounted upside down on the rear deck, when complete the wiring is completely tied, tucked, hidden by factory carpet with minimal impact on cargo space/usability. One final mod was the addition of 4 Cree XHP70 LEDs to illuminate the trunk. WOW. Best modification EVER! SO much more usable!

Here are some pics for fun.
 

Attachments

  • IMG_7091.JPG.webp
    IMG_7091.JPG.webp
    61.3 KB · Views: 51
  • IMG_7090.JPG.webp
    IMG_7090.JPG.webp
    75.3 KB · Views: 52
  • IMG_7089.JPG.webp
    IMG_7089.JPG.webp
    145.9 KB · Views: 59
  • IMG_7092.webp
    IMG_7092.webp
    208.3 KB · Views: 46
  • IMG_7093.webp
    IMG_7093.webp
    111.5 KB · Views: 52
  • IMG_7094.webp
    IMG_7094.webp
    117.7 KB · Views: 44
  • IMG_7095.webp
    IMG_7095.webp
    97.8 KB · Views: 48
  • IMG_7097.webp
    IMG_7097.webp
    117.8 KB · Views: 45
  • IMG_7099.webp
    IMG_7099.webp
    137.2 KB · Views: 45
More pics
 

Attachments

  • IMG_7256.JPG.webp
    IMG_7256.JPG.webp
    129.6 KB · Views: 36
  • IMG_7255.JPG.webp
    IMG_7255.JPG.webp
    67.4 KB · Views: 38
  • IMG_7103.JPG.webp
    IMG_7103.JPG.webp
    112.4 KB · Views: 39
  • IMG_7265.JPG.webp
    IMG_7265.JPG.webp
    79.4 KB · Views: 37
  • IMG_7247.JPG.webp
    IMG_7247.JPG.webp
    160.8 KB · Views: 37
  • 48796616944__79988D69-2FF7-4535-98F4-5BE58A147C05.JPG.webp
    48796616944__79988D69-2FF7-4535-98F4-5BE58A147C05.JPG.webp
    137.3 KB · Views: 38
  • IMG_7248.JPG.webp
    IMG_7248.JPG.webp
    150.6 KB · Views: 42
  • IMG_7249.JPG.webp
    IMG_7249.JPG.webp
    175.9 KB · Views: 38
  • IMG_7383.webp
    IMG_7383.webp
    70.8 KB · Views: 42
And more
 

Attachments

  • IMG_7060.JPG.webp
    IMG_7060.JPG.webp
    55.4 KB · Views: 34
  • IMG_7058.JPG.webp
    IMG_7058.JPG.webp
    84.8 KB · Views: 33
  • IMG_7034.JPG.webp
    IMG_7034.JPG.webp
    170.5 KB · Views: 38
  • IMG_7061.JPG.webp
    IMG_7061.JPG.webp
    45.5 KB · Views: 38
  • IMG_7063.JPG.webp
    IMG_7063.JPG.webp
    36.9 KB · Views: 34
  • IMG_7065.JPG.webp
    IMG_7065.JPG.webp
    70.9 KB · Views: 36
  • IMG_7083.webp
    IMG_7083.webp
    24.5 KB · Views: 42
  • IMG_7079.webp
    IMG_7079.webp
    78.9 KB · Views: 38
  • IMG_7076.webp
    IMG_7076.webp
    104 KB · Views: 35
______________________________

Help support this site so it can continue supporting you!
This might be it...idk lol

As you can see...very busy. The car is finally coming together though!!
 

Attachments

  • IMG_7085.JPG.webp
    IMG_7085.JPG.webp
    120.9 KB · Views: 54
  • Unknown-1.webp
    Unknown-1.webp
    137.4 KB · Views: 41
  • Unknown-2.webp
    Unknown-2.webp
    136.5 KB · Views: 42
:blink: holy shit that's a lot of projects going at one time!! Great job and initiative to go places with the car many would be afraid to start. You did to your interior the equivalent of what Kranz did to the motor. Unbelievable things. What do you do for a living because you're really good with electronics and wiring?
 
I'm enjoying this build & nice choice on the PS8.

*If you still have the door panels off*, can I suggest taking some of the RattleTrap scraps you have leftover and wedging little pieces in the small gap between the door card and the switch assemblies (window switches especially).

If you've got any closed cell foam laying around, make something like these joints---> Fast Rings


Is it weird that I want to check out your laboratory and go through your tools? :thumpsup:
 
Back
Top