• This section is for help and assistance with 2018 and NEWER Buick Regals. If you need assistance with a 2011-2017 Buick Regal, CLICK HERE. If you need assistance with a 2010 or older Buick Regal, CLICK HERE. This notice may be dismissed by clicking the X in the right corner.
  • Car enthusiast? Join us on Cars Connected! iOS | Android | Desktop

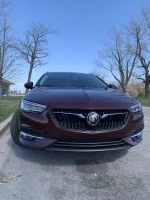
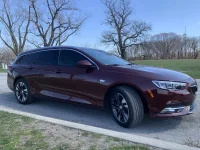
How to swap a TourX to Sportback front bumper

I was also wondering if there is a way to tell if I currently have adaptive cruise control?
The Grill with adaptive cruise control

s-l1600.jpg
 
And this is the one without adaptive cruise.
As you can see, you can poke your finger through part of it.
proxy-image
 
It is needed when removing the black plastic trim/cladding from the car
Oooo right....
I forgot about the hideous protective cladding.
At least the Aztec in the second year had all colors of cladding. The 02 one we had was all white and the only option it had was the tow package.
I assume GM decided to make all color cladding available after critical cladding training.
Appears Buick years later, forgot the training and became non-color blind cladists again.
 
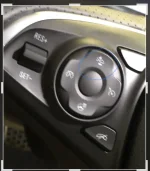
I was also wondering if there is a way to tell if I currently have adaptive cruise control?
If you’ve ever driven with cruise engaged you’d know right away just by way car speeds up and slows down on its own.

Visually though If the round rocker button looks like this you have adaptive cruise. If the top of the rocker is blank then you don’t have ACC.
 

Attachments

  • D3226F4A-F0FC-4189-BE37-3379C842DEA5.webp
    D3226F4A-F0FC-4189-BE37-3379C842DEA5.webp
    40.8 KB · Views: 12
  • Like
Reactions: D2R
Also if you use a GS bumper what are members like Skynet doing with the fog light harness and bulbs since they are not used? are you guys simply securing them out of the way some how and keeping them in tack or is there a way to remove it without causing issues?
I have euro tails with rear fog light and a euro light switch. I could not quickly figure out how to route rear fog light wire to the BCM, so I wired it directly to the front fog light harness. Now I have a rear fog light fog heavy rains and dense fog.
 
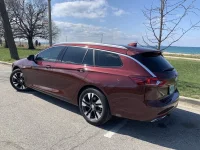
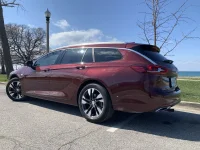
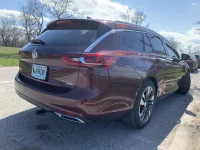
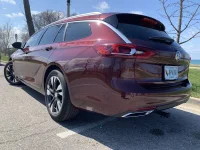
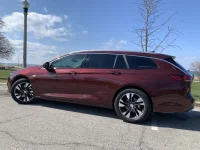
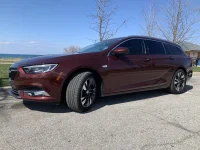
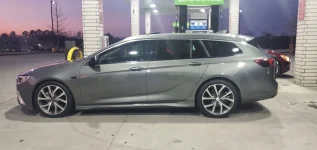
welp - this silly decladding journey started for me back in July 2020. Nearly 2 years later, I have finally completed it…View attachment 37792
Forgive me, but did you ever post up what you ended up doing for the rear bumper? I want to say you were debating a couple different ways to go about doing it, but it’s been so long since I’ve been on this site I don’t remember what is what anymore. Regardless, it looks great
 
Forgive me, but did you ever post up what you ended up doing for the rear bumper? I want to say you were debating a couple different ways to go about doing it, but it’s been so long since I’ve been on this site I don’t remember what is what anymore. Regardless, it looks great
Ah yes - I tried to fit up a sportback lower rear valance to the TourX. Short version - it doesn’t really work and I couldn’t find a reasonable way to fabricate it as such. Ended up bringing in a used rear skin with the lower side flares and proper rear valance and had it painted to match. thanks for the compliment - I’m happy to be done.
 
Unless I'm missing it, your rear bumper looks different than Zaxer's, what did you do to swap yours out?
@Zaxer has the Opel Sports tourer rear side skirts and @WaWaZat does not. It's an additional piece (left and right) that has to be bought from Germany. Cost can be anywhere from $800-$900 for the pair.
 
______________________________

Help support this site so it can continue supporting you!
  • Like
Reactions: D2R
@Zaxer has the Opel Sports tourer rear side skirts and @WaWaZat does not. It's an additional piece (left and right) that has to be bought from Germany. Cost can be anywhere from $800-$900 for the pair.
yep - that’s correct. In my case I was able to get the whole rear skin with the side skirts and rear valance included….note the extra parking sensors on the rear 3/4 bumper which are not functional. It appears @WaWaZat did get the import rear valance piece.
 
yep - that’s correct. In my case I was able to get the whole rear skin with the side skirts and rear valance included….note the extra parking sensors on the rear 3/4 bumper which are not functional. It appears @WaWaZat did get the import rear valance piece.
@WaWaZat just left his bare like I did.20211226_174911.webp
 
  • Love
Reactions: D2R
Sorry if I'm being a pain, so did you just pull the plastic cladding off the wheel well back and across the rear bumper, and that's it? For some reason I thought entire rear had to be replaced.
No worries. Yes, most of us who have done this have just pulled the cladding off. That's why we call it de-cladding. The only exception is the front bumper having to be replaced by the GS bumper or the standard bumper.
 
did you modify the existing rear valance? (the panel with the fake exhaust ports)
That part will have to be replaced by an original European part as well.
 
Continued...
9. Locate the harness - its sitting behind the passenger side high beam. I gently pulled my down from the engine and was able to get another 3-4" to work with...
View attachment 23918
10. The harness itself was a bit tricky for me. Slide the red tab lock down towards the ground. Once the red lock is out of the way, you theoretically should be able to push the black part of the tab down (towards the center of the harness) to release the tab lock and pull them apart. However I had to insert a very thin flat head screwdriver on the opposite side to unlock it.
11. If you are switching out components (grill and fog lights), I started with the grill. Remove the long thin foam absorber from behind the inside bottom of the grill (it's loosely held in place by 4 hooks) - as seen here:
View attachment 23919
...by the way, that clear line running through the foam is the active hood trigger for pedestrian impact...
12. Start with a lower corner of the grill and gently start pulling inwards...once you get it started it will start to unclick.
View attachment 23920
13. remove the fog light trim pieces. Note there is a screw on the bottom of the middle bar of the fog light trim - towards the center of the car.
View attachment 23921
14. Gently push the fog light trim from the back - work from the center towards the outer edges of the bumper - note there are tabs on the outer edges...and they would be pretty easy to break.
View attachment 23922
15. Once you have the fog light trim off, the fog light housings are set with (3x) T-20 screws. Simply unscrew and remove. Note - this would have been the perfect time to run some colored lamin-x over the fogs (yellow for me please), but I thought of it too late.
View attachment 23923
And that's pretty much it...now reverse to put the new sportback bumper back together and back on your TourX.

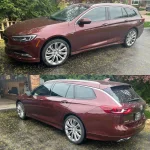
And of course here are a couple beauty shots of the finished project...

View attachment 23924
View attachment 23925
I realize this is a frivolous project - but the cladding just isn't for me. I just ordered the side skirts...which will be the next phase 🙂
I notice when you pulled the bumper you damaged the putter tab. Did you have any issues putting on the new bumper? Did you have to hit the bumper to force it to flush with the fender or is it a quick snap on?
 
I notice when you pulled the bumper you damaged the putter tab. Did you have any issues putting on the new bumper? Did you have to hit the bumper to force it to flush with the fender or is it a quick snap on?
I did note that in step 3 of the write up. There is a retaining clip that needs to be loosened via a 10mm nut - if you do that first the bumper will pull out from the fender without damaging the tabs. When inserting the new one, it should go in without a lot of force but will go in snug. You would then re-tighten the nut on the bracket to lock the tabs back into the clip…good luck!
 
Back
Top