Follow along with the video below to see how to install our site as a web app on your home screen.
Note: This feature may not be available in some browsers.
This section is for help and assistance with 2018 and NEWER Buick Regals. If you need assistance with a 2011-2017 Buick Regal, CLICK HERE. If you need assistance with a 2010 or older Buick Regal, CLICK HERE. This notice may be dismissed by clicking the X in the right corner.
@Lt0302, I've had the center shift console apart to get the switch out. It's not too difficult. When I get a chance I'll take some pictures and describe the process with a bit of detail if anyone's interested.
Everything snaps together/apart. There are three wiring connectors to undo for the shift lever position, LED gear indicators, and the switch itself.
Here goes my step by step instructions for removing the center shift console, bear with me. Since there is a limit on how many attachments I can add, I have bundled some of the images together.
Difficulty
1 or 2 beers
Tools needed
Hands
Thin shims/screwdrivers/credit cards (whatever works best for Step 9)
Hints to pay attention to before you tear into disassembly
Take your time
Plastic is plastic, and plastic breaks
Be mindful of the metal clips that can quickly scratch up the interior plastic pieces
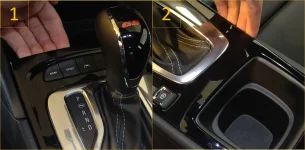
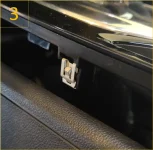
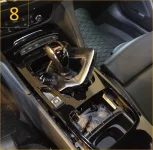
Slide the front cup holder cover open fully so it's out of the way. Once this is done, with both hands grab the edge of the plastic and gently but firmly lift up.
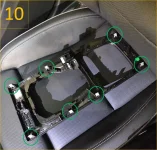
Two of the seven clips have now been released. Three more are in the middle, and the last two are behind the single cup holder (skip to Step 10 to see where these clips are located). Now, work your fingertips along the edges to pop the other clips. Be very careful not to apply too much pressure on the narrow portions around the cup holder. Just keep working your way around until they are all free.
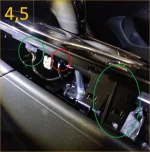
Here are the metal clips that you need to watch out for. They will scratch the interior plastic. I recommend placing some microfiber towels or equivalent between these clips and the plastic.
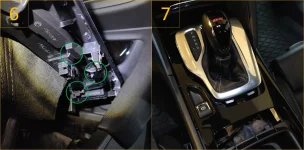
With all clips released, it's now time to tackle the wire connectors. Remove the parking brake switch wire first. You'll have to feel around a little bit, but the button to release the clip is on the passenger side.
Next, remove the drive mode switch connector. The button to release the clip is toward the front of the vehicle. Leave the small connector in the middle attached (circled in red).
Now detach the center chrome trim piece. There are six small clips around the outside (circled). It helps to apply pressure upward to prevent the clips from snapping back in place while you tackle the others.
Once all of the clips are free, the center trim piece slides towards the front of the vehicle.
With the center piece free, the black or brown wood pattern trim piece can be lifted straight up. Rotate the chrome piece so that it fits between the black/brown wood pattern trim as shown here.
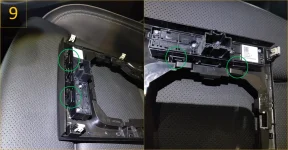
Now, time to remove the switch. There are tabs on either side of the switch that hold it in place. They are very stubborn but it can be done. Here is where it is helpful to use some credit cards to hold each individual tab open. With all of the tabs pulled away from the switch, it can be pushed through the bottom (connector side).
Full view of trim piece for reference of metal clip locations.
All that is left to do now is to swap the switch assembly and reinstall everything just as it came apart. Just give all of the clip locations a firm press and they will seat nicely. There are really no other tricks or hints I can give here as it goes together much simpler than it comes apart... so if you made it this far, you should be fine. Just remember to have all of the wires connected.
Please feel free to ask additional questions if I didn't explain something thoroughly enough!