• This section is for help and assistance with 2018 and NEWER Buick Regals. If you need assistance with a 2011-2017 Buick Regal, CLICK HERE. If you need assistance with a 2010 or older Buick Regal, CLICK HERE. This notice may be dismissed by clicking the X in the right corner.
  • Car enthusiast? Join us on Cars Connected! iOS | Android | Desktop

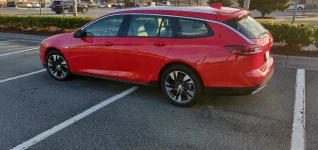
I Removed the Plastic Cladding Trim on the Tourx

Subscribed for more results on the decladding process. I also like the Opel look better. And how do we lower the ride height down the couple inches Buick decided it should be raised?

Order suspension from Europe for the Insignia B Sports Tourer...?

The height is only about a half inch higher than the Sportback, but I’m not sure if the Sports Tourer was lower than that.
 
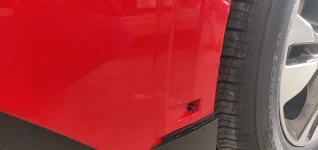
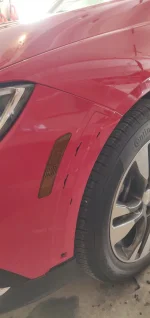
So as an update for those interested this is what it looks like under the plastic forward of the bumper seam.

13694136951369613697

I am going to fill the notches and paint first. If it doesn't turn out as well as I like, I will get some estimates to fill and paint the bumper. I actually like the black on the side skirts and bottom of bumpers on the red. I am on my way out of town for a week or so, but will update when I get back and get the notches filled and painted.

-Chris
 
Given that the notches are just in the plastic, I would be (will be) tempted to just leave them as is... They look a little odd, but only a little.
 
Thanks. I really am happy with it so far. I will do a short write up of what I have done in about two weeks. Won't be back in town until a week and a half from now. Pretty easy really though. Short version is the adhesive removal is the biggest headache. If you do this, the rear bumper is a place to be very careful as the paint, on mine at least is very soft. Without any heat I nicked a small pinhead size area with my thumbnail peeling a small bit of adhesive.
 
On the plastic bumpers, plastic razor blade and goo gone is what I used. Wet the adhesive and let it sit for a couple minutes, then use the plastic razor blade, took me several cycles of this. For the metal body, using a drill and 3m eraser wheel is so much easier, quicker and cleaner. I did use a plastic razor blade to trim the adhesive down close to the body, then the wheel. Would not recommend on the plastic bumpers.
 
______________________________

Help support this site so it can continue supporting you!
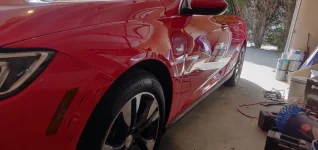
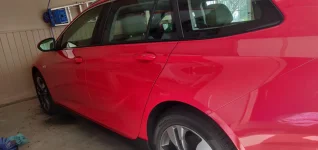
Here's a couple out of garage pics.

I am happier already. Once I get the notches filled and painted I'll be content.
View attachment 13699View attachment 13700
That looks absolutely excellent! The little notches don't even bother me THAT much, even though they do annoy me a little bit. I do think that now the car might need to be lowered just a tad to finish off the look. That is definitely something I'm considering myself, once I need new shocks at some point in the car's life.
 
Be nice if they made a plastic body colored plate of some sort that you could bolt on to cover.
 
I think he's saying the cladding WILL hold moisture...
As an owner of a rust free (in Illinois) Volvo XC70 with similar cladding, I haven't had an issue. I had the same concerns, but just doesn't seem to be an issue.
 
______________________________

Help support this site so it can continue supporting you!
Just stumbled on this. This looks great!! Will definitely consider doing the same thing here.
 
Be nice if they made a plastic body colored plate of some sort that you could bolt on to cover.
I think this could be accomplished by making a mold for the part using the original cladding piece, then create a replacement fiberglass part and paint to match. Would just need to fill/sand the texture transferred to the mold by the cladding piece but don't think would be too hard to do. Another alternative if you have the means, would be to sand & prep the cladding, prime it with epoxy fill & sand to get rid of texture, prime again with a good urethane primer, then color match. I did this on an old Toyota Tercel that had black plastic bumpers similar to the cladding and was able to get rid of all the texture.
 
Last edited:
Thanks. I really am happy with it so far. I will do a short write up of what I have done in about two weeks. Won't be back in town until a week and a half from now. Pretty easy really though. Short version is the adhesive removal is the biggest headache. If you do this, the rear bumper is a place to be very careful as the paint, on mine at least is very soft. Without any heat I nicked a small pinhead size area with my thumbnail peeling a small bit of adhesive.

Did you finish on the fill/touch up of the holes in the bumper? Would love to see it...
 
Adhesive: a little heat and some Goo-Gone? Or in a pinch, kerosene?

I do not recommend goo gone. Just apply a lot of heat and make sure you are careful of the plastic bumper. I used the goo that was removed to pull the remainder off
 
______________________________

Help support this site so it can continue supporting you!
Fantastic! I so want to do this.
 
If TourX was a Chevy...... GM would have had delete option like they did on the Avalanche.
 
If TourX was a Chevy...

It's an Opel, and they DO have a "delete" option: The regular Insignia wagon.

GM has simply failed to import the regular wagon...

FWIW, Subaru doesn't offer a delete-the-fugly-cladding-and-roofrails option on the Outback, either.
 
I'm really considering just lowering and painting the cladding to match. Maybe get rid of the little tab on the top of the wheel arches. Seen it around before and I don't think it looks too bad...

 
Back
Top